Advanced Template Development
The users who decide to choose the advanced level of customization will have a fully adapted Template for a ample range of brand campaigns. Veeva Vault PromoMats and Assembler Online provide users to the solution of creating their own starter templates, starting from global approved structures that can be copied and modified to fit the local needs.
Summary of the basic template development:
Select the Global template – Make a copy and fill the metadata – Return to your library – Build the template – Business Approval process and tile replacement – Approve for Distribution and publish
First Step: Select the appropriate template for the market purposes
From the “Portal” area of Veeva Vault PromoMats, select the Global Portal. Upon entering, click on the Starter Template widget to display all available templates. Use the filters -such as brand- to refine the search and write into search bar at the top of the screen the type of template, either Veeva or Salesforce Marketing Cloud (SFMC), as emails are also defined by their delivery platform. Choose the Starter Template which better fits with your purposes.
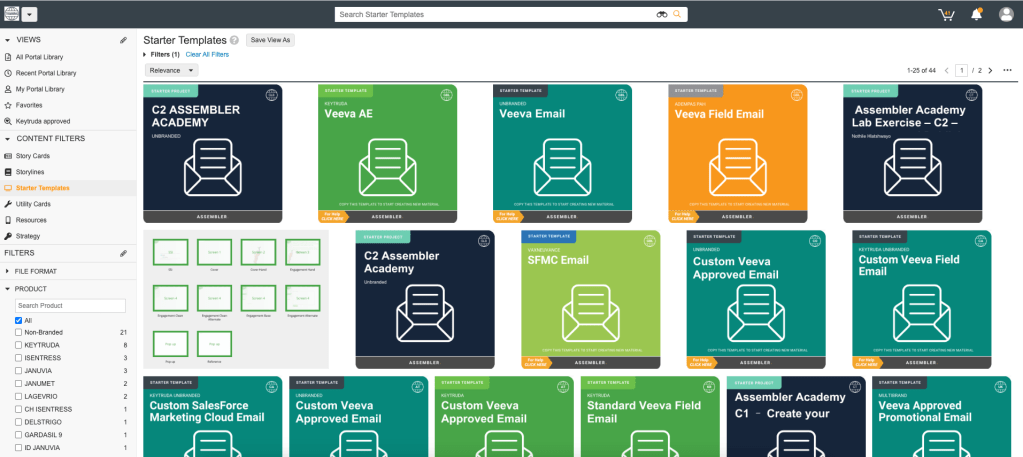
Second Step: Make a copy and Fill the metadata properly
Click on the template and click on the eye icon to view its full details. To reuse the chosen template, users should make a copy to their library by clicking the three dots and selecting the Make a Copy field shown below.
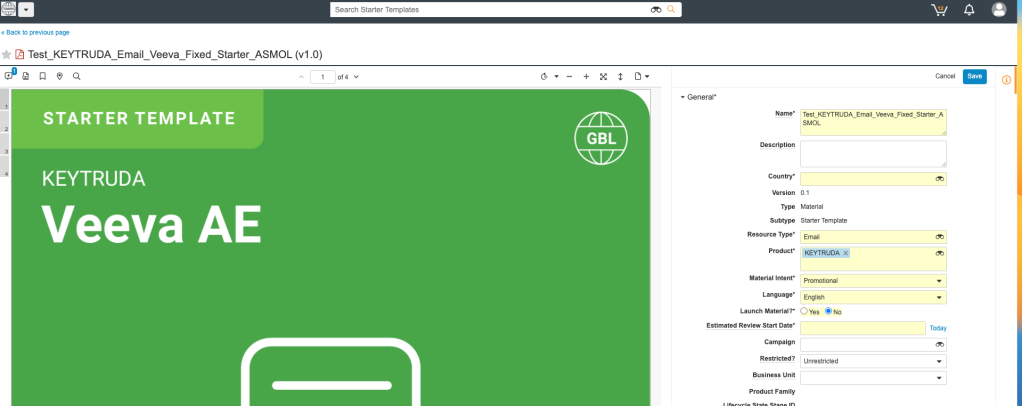
Once the copy has been made, the name and metadata will show up for the copied template. Now, by filling the Metadata is when the Starter will be prepared to be used locally. Consequently, take special attention choosing the country and language.
Third Step: Return to your library and open the project
Your projects will always be saved into “My Library” folder inside the Veeva Vault PromoMats Library. Therefore, return to your library and open your new template by clicking on “Open with Assembler” through the action’s menu (three dots). The project will open in a new browser tab.
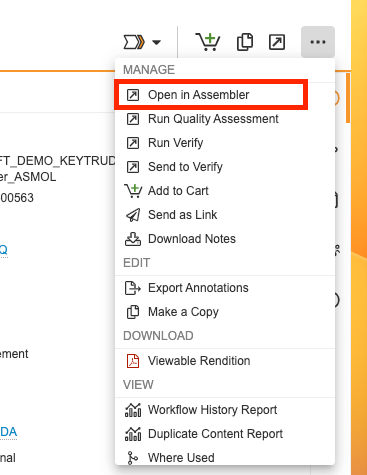
Fourth Step: Build the Starter Template
To know how to edit and use Assembler Online, please read the articles in the Work with Assembler Online section, which explain all the editing functionalities of Assembler Online. We summarized some of the most used editing topics in the below table:
| Changes | Do-It-Yourself | More Information |
|---|---|---|
| Add a custom image header | Delete any undesired layout or image from the project. Add a “Full Width Image” from the Layouts tab. Add the header image from the “Images” section of the Assets tab. | Building through Layouts Image components |
| Customize main body | Add “Image Text” or “Text Image” layouts to the project. Use the + icons under each cell to add desired rows to the column. Modify the column style as needed. Drag and drop content in the cells. | Layouts’ performance Cells performance Text Components |
| Include local information on footer | Create layouts for the PI, disclaimers, branding etc. depending on country and brand guidelines. Fill in the text and images as required. Add call to actions if required. Add the reference citations block from the Assets > Elements menu. Review the project and add spacers if needed | Call to Action Buttons Reference Citations Spacer Elements |
Once the template doesn’t need further modifications, the last click in Assembler Online should be upload to PromoMats/Upload for review. All the changes will be saved.
Fifth Step: Finishing up -> Replace the Tile and send for Business Approval.
The Starter Template should comply our company standards, consequently, the business team will revise the material and correct it if needed. Once the process is over, the material will get the “Approve for Production” Stage. Before starting the Approve for Distribution and publishing procedure, the Job Owner can replace the template preview with a custom tile.
Every Global template (and consequently, the copies of them) has into the attachment section a tile template in PDF:
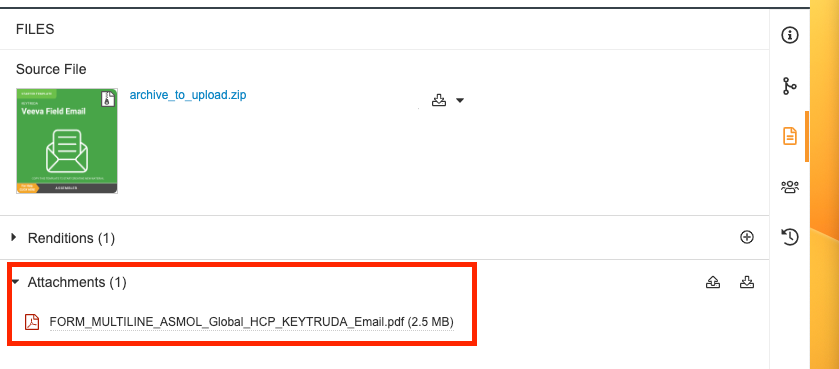

Users can download and fill easily the PDF, save and replace the preview by:
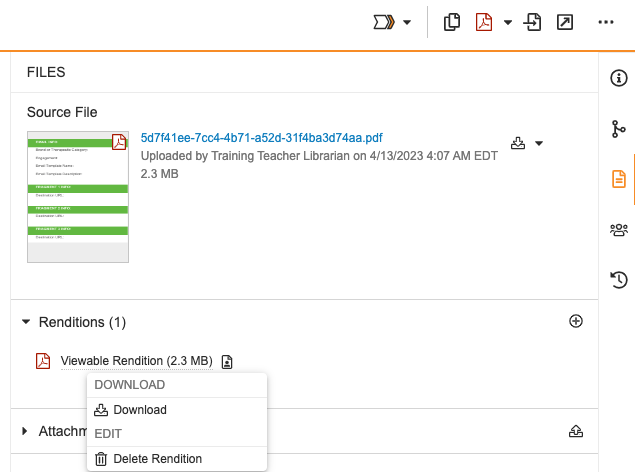
1. Deleting the preview by going to renditions and pressing the cross icon.
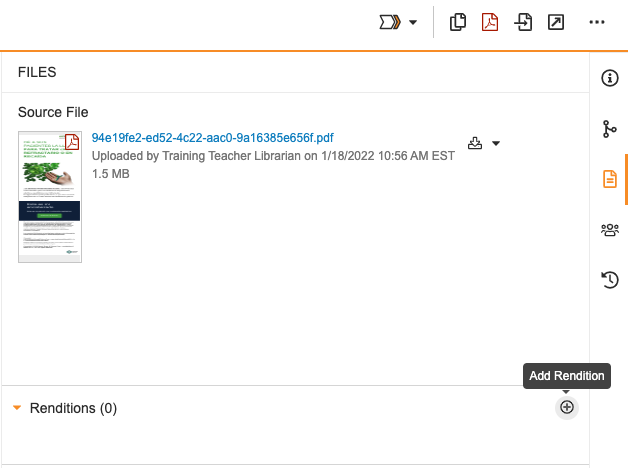
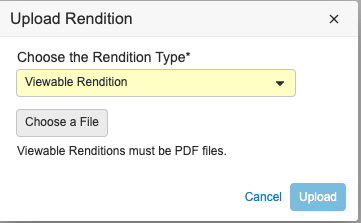
2. Press on the plus icon and choose the PDF into the browser and selecting Viewable rendition in the dropdown menu.

3. The new tile will appear as a main rendition, as well as the thumbnail.
Sixth Step: Make it Reusable!
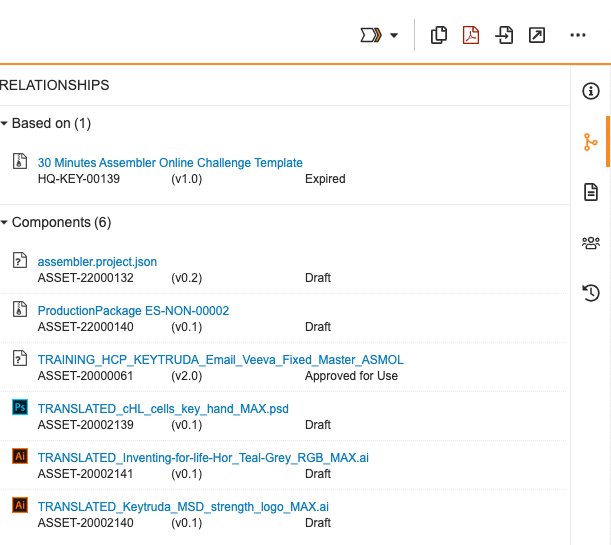
Approve for Use the Template’s linked Components
Once you have your customized Template in “Approve For Production” status, don’t forget to also Approve for use the components, which are linked to your Material Template.
- Open in full view the Component and press the gear icon. Select “Send to librarian for Approval”. If the image has a purchase license or an agency agreement please add it in Attachments section of the Component.


2. Click on Start.
Contact personally with the appropriate local Asset Librarian and share the Components document number. The Asset Librarian will add the corresponding description of the terms of use, and Approve them for future re-use, following the local organization requirements. Learn more about Asset Librarian role and components management here.
Approve for Distribution the Material Template and Publish!
The Approve for Distribution stage is initiated by pressing on the arrow icon and clicking the “Approve for distribution” option.

Don’t forget Now, to share the template across the company, it needs to be published. To carry out this action, the Job Owner will need support from the local Content Steward, contact him personally. This role will publish the Template into the Portal by clicking on “edit fields”, scrolling until “Portal details” and choosing the desired Portal.