Create a new resource
Create a placeholder for the future project
To make a new placeholder, press Create button located in the right side of the navigation bar. Select Placeholder on the dropdown menu.

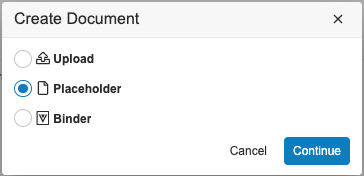

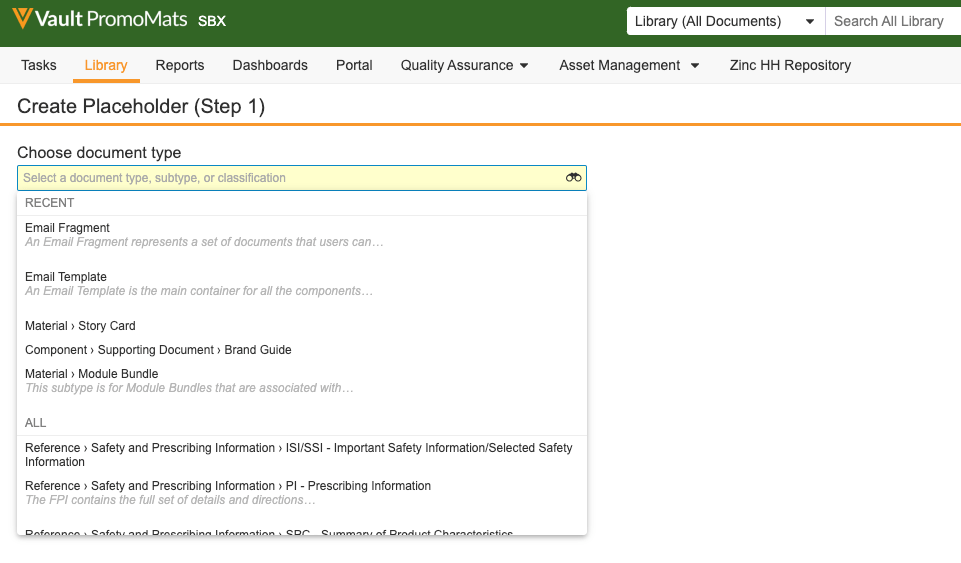
In the next screen, select the type of piece you will develop. All the document types and subtypes are displayed pressing the binoculars. In addition, you can find your recent document types pressing the placeholder.


Fill the document’s metadata properly, all the yellow fields are mandatory. Once all the required metadata be filled, press Save.
Navigate and shop for new content
Go to the desired Portal and click on Storyline widget, navigate through the different brand storylines and refine the search with the filters (e.g.: select the product you are interested). Select the Storycard you are interested in, and press the “Full view” icon in the right corner, the StoryCard will open in order you can deeply review it. Mark it as favourite pressing the star icon next to the tittle to add it to your favourite list.

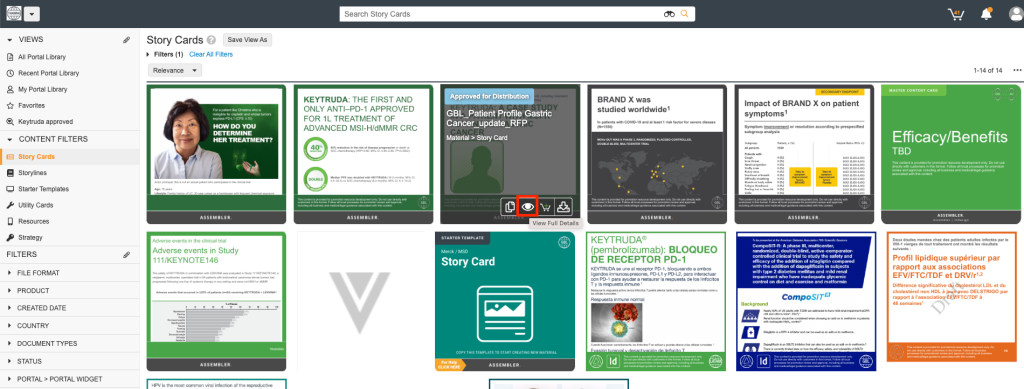

With the content selection done, next step is to go back to your previously created project to add the content you just selected.
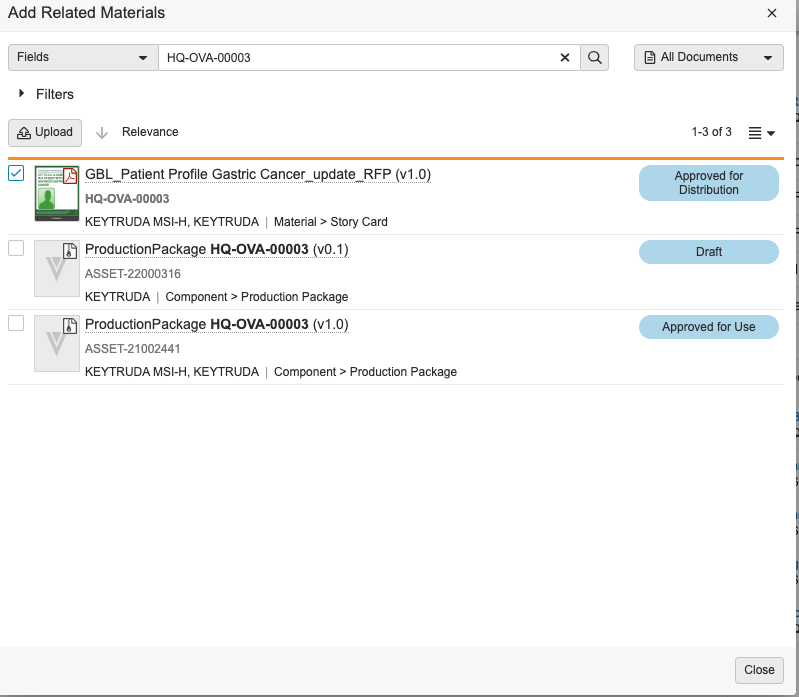
Go to the Related Materials section of your project and click the plus button. In the new pop-up window you can access to all approved assets. To find your favourite content easily, click on all documents drop down menu and choose favorites, therefore, will be shown your favorites list. Press on the plus icon of each document you want to add to your placeholder.

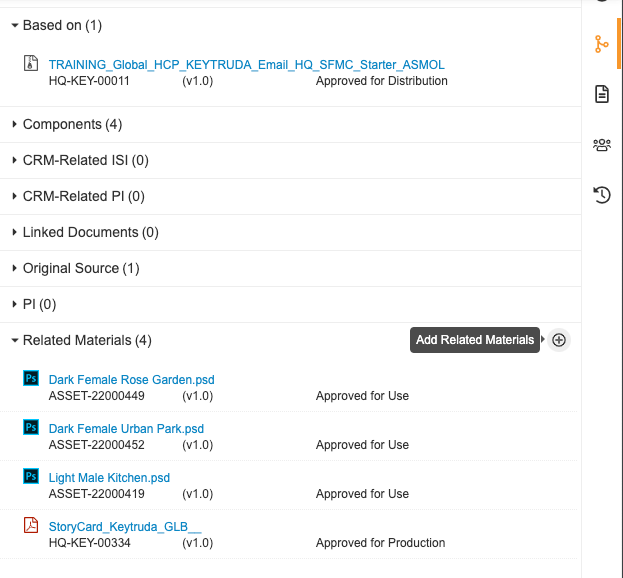

Download the content and start working with it
To download all the source files related in your placeholder, go to the Related Material section and click on the previously related StoryCard. Once the StoryCard is opened, press the gear icon at the top, and select Export all files option. Check your notifications in your tasks page, a zip will be ready to download.


Upload your project to PromoMats
Once finished the new job, go to the project placeholder you previously created. To upload your new job pressing Upload File button. In the case you need to upload later a second version, you will need to press the gear icon and select upload new version. When the process of uploading finishes, a viable rendition will be rendered as a preview in your project.
References and anchors
You can bring forward the annotations of the source content, using in the three dots icon, with the option import document links.


A pop up will appear in order to select the content you want to import the links from. As you previously marked this source content as Favorite, you will find it easy selecting Favorites from the drop down menu at the right. Last step is to press the plus icon next to the content to import the links. The system will display all the annotated scientific papers, together with the listed anchors in the Linked Document section, so you will just need to relate them to your claims using the target icon of each anchor and pressing the save check box. To relate properly anchor and claim, you can use as guidance the PDF with annotations of the source document (the StoryCard).
You can also add new references to your job: to annotate your job, go to the annotations section pressing Annotate at the top left, and click on the chain icon. A pop up will be displayed. Search the reference material and choose the anchor. If there’s any appropriate new anchor to add to that reference, create a new one pressing the plus icon, going through the reference material and highlighting or marking the text, and the new anchor will be created.
