Publishing an iPad/Engage Meeting presentation
In this video, you will see the process of approving and publishing an iPad Presentation
1. Create the iPad Material and Approve it for Production
The job owner creates a Material Document (resource type/ Ipad Resource), send it to their design team through PromoMats sending a “Request Revised Content” task and lastly submit the final iPad job through the local country’s PromoMats Medical Legal Review process until “Approve for Production” status.
- Job Owner Creates a material / iPad Resource. If using Assembler, the start point will be to “make a copy” from an iPas Starter Template. Learn more about how to use Assembler features here.
- Job owner send a “Request Revised Content” task to the agency/design team, to design the iPad screens.
- When the design is complete the job owner can “Complete” the task. Learn more about how to create iPads with Assembler here.
- Once completed the design and annotations, the job owner can “Send for Approval” in order the Medical Legal Review team can approve it.
- Once approval is completed, and the project is in “Approved for Production”, we can start the publishing steps, to sync the iPad presentation from Veeva Vault PromoMats platform to Veeva CRM platform, available for our Sales Representatives.
2. Create the multichannel presentation binder
- Click on Create/Binder.

- Classify Document – click binoculars: Type – Multichannel Presentation. Click NEXT.

3. Fill the Metadata Properly
Complete the Information required fields (shaded in yellow) per your country’s process:
- Name Use local naming convention
- Description recommended
- Country
- Language
- CRM Product Select your product. It will NOT contain your country’s prefix.
- Business unit – All
- Local fields used in your country
Make sure that the CLM Content is marked as “yes” on the CLM Properties section.
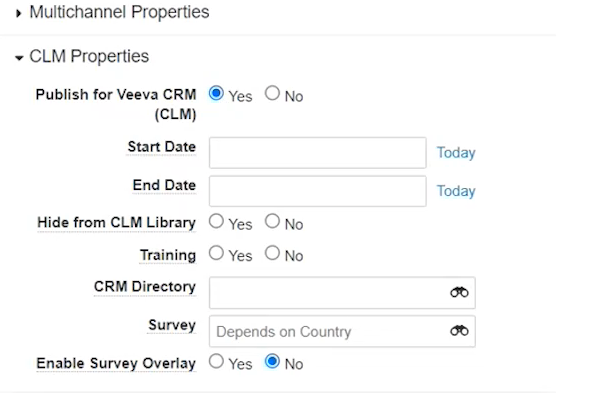
If you want to add a Survey in your iPad CLM presentation, please take a look to this article to learn how.
SAVE the multichannel presentation
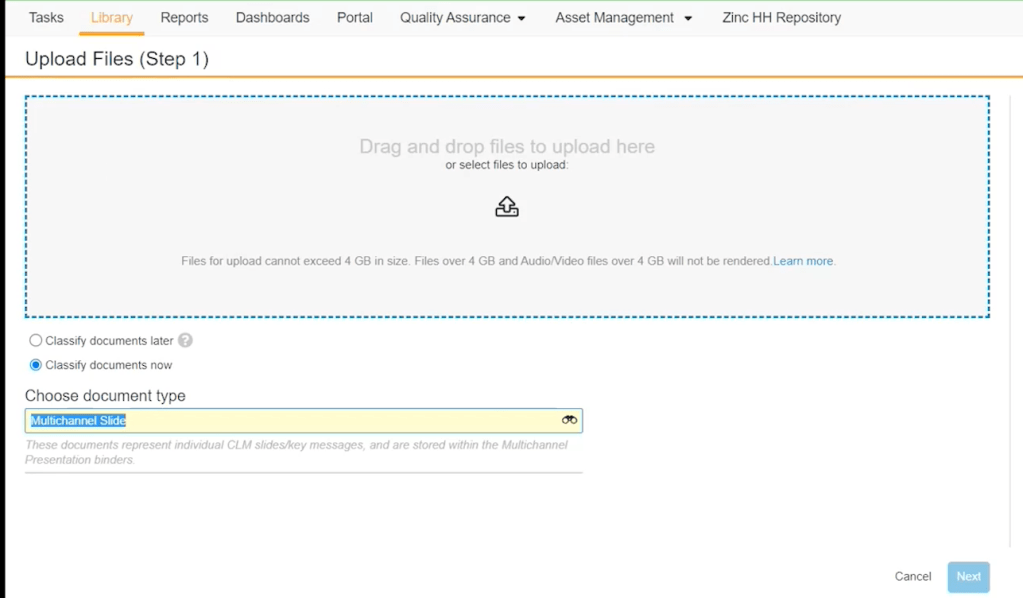
4. Upload the Multichannel Slides on the Multichannel Presentation
To upload slides, click on Edit Binder next to the gear icon. Choose add…


- Existing documents – if the presentation slides are already on the system
- Upload – if the slides are in your computer. You can upload several slides at the same time in bulk and fill the metadata in bulk.
- If your Multichannel Presentation has been designed using Assembler, you can obtain the Production Package. Your Assembler production package will be stored in your Material/iPad, inside the Components section. Download it and un-compress the Package, you will see it contains all the slides and the shared folder, already organized for this upload process, where each slide is separated in and independent .zip file.
IMPORTANT: The Assembler Production package is a Restricted component and only the owner of the Material/iPad can view it and download it. To make it visible for everyone, the Production Package should be in an Approve for Use status or the digital publisher user, should have an Asset Librarian role. Are you interested in becoming an Asset Librarian? Submit a ticket by clicking here
The slides are zip files that contain HTML, CSS and images. The slides must be classified as Multichannel slides.

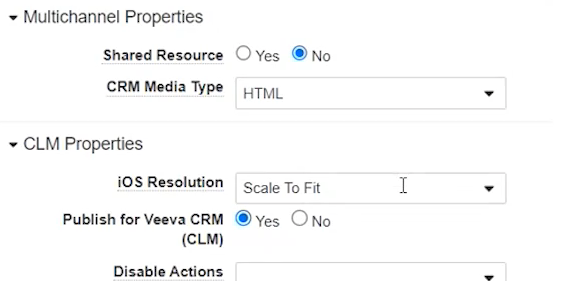
Specific metadata to add in all the Slides:
- Multichannel properties – CRM Media type: HTML
- CLM Properties – iOs Resolution: Scale to Fit
- CLM Properties – Content: YES
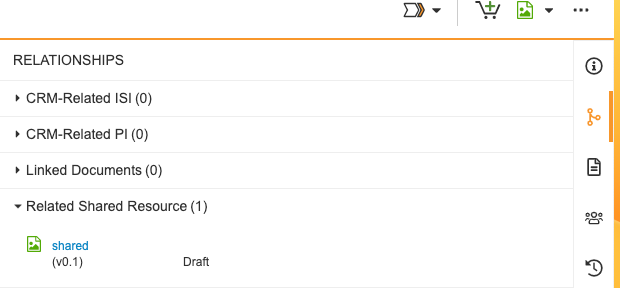
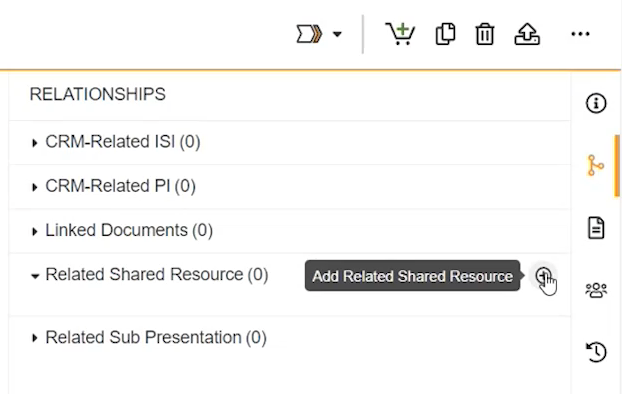
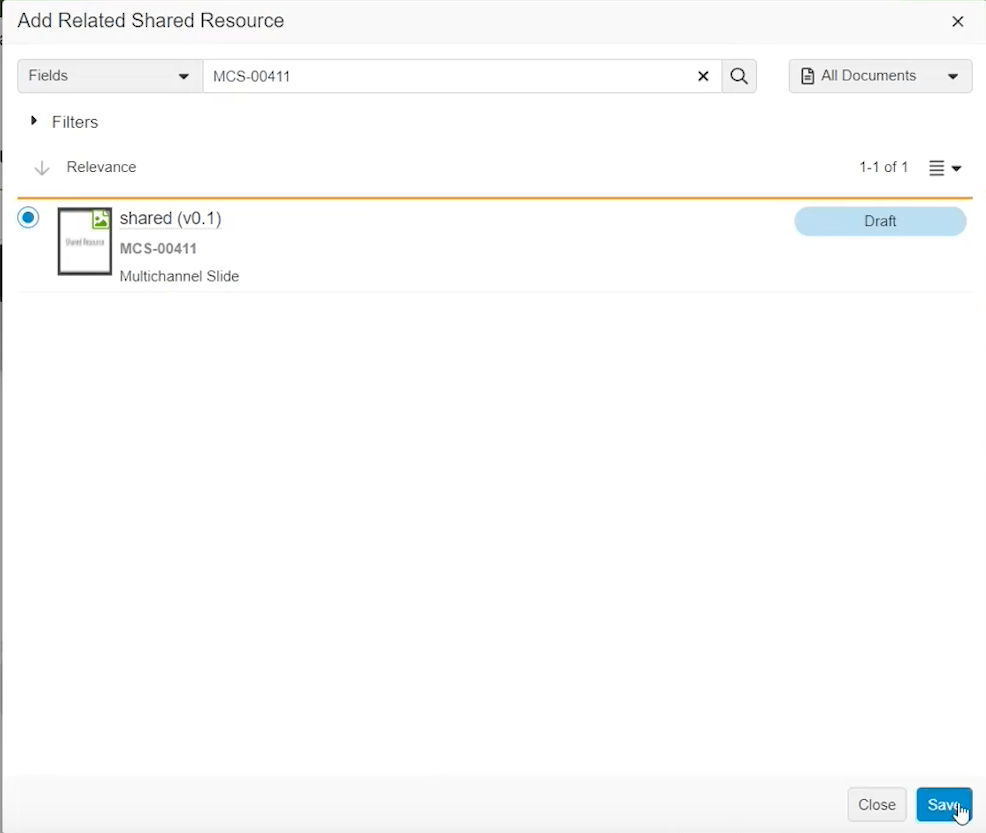
Users have to include the shared multichannel slide relationship in each slide of the presentation (With the exception of the Shared folder itself). To add it to each slide, go to the Share slide and copy the document number. Then, go through each slide and go to the Relationship section and look for “Related Shared Resource”. Click on the plus icon and paste the Share slide’s document number you copied before. Then, add it.
Repeat this process with each of the slides except for the Shared slide.
Tag the Shared slide as:
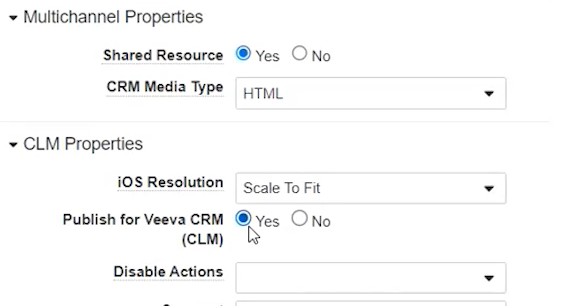
- Multichannel Resource – Yes
- CRM Media type: HTML
- CLM Properties – iOS Resolution: Scale to fit
- CLM Properties – Content: YES
- Shared Resource YES
5. Change the status of the Multichannel Presentation binder, the slides inside it, and the shared slide.
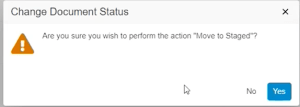
Press on the gear icon, and choose Stage for Testing in the dropdown menu to move forward the Multichannel Presentation and the multichannel Slides to Staged Status. Choose YES.

IMPORTANT!: The Shared slide must be removed from the Multichannel Presentation Binder.

To perform that action in bulk for all the slides, follow these steps:

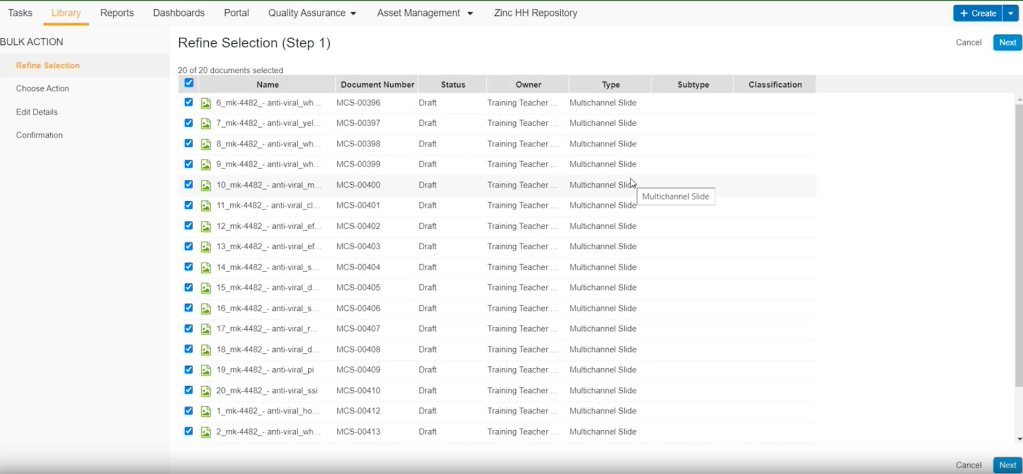
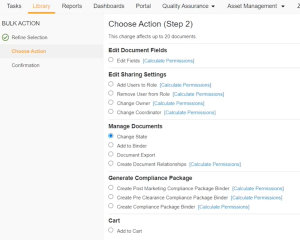

6. Functional Check
The Technical Approver will do a functional review of the Multichannel Presentation in the iRep app. to confirm the presentation meets the device/platform standards.
Note: This step should take place after the original iPad Resource material Document is AFP but before the Material Document is AFD, following your country’s Medical Legal Review process.
7. Approve for Distribution state for the iPad Material
If the functional check is successful, the Job Owner changes the iPad Material status to AFD, by clicking on the gear icon.
The Technical Approver links the original Material/iPad Resource which now is AFD, to the Multichannel Presentation, in order the material expiration date auto-removes the CLM presentation from the iRep library:
- From within the Multichannel Presentation document, navigate to the Linked Document tab in the Information panel.
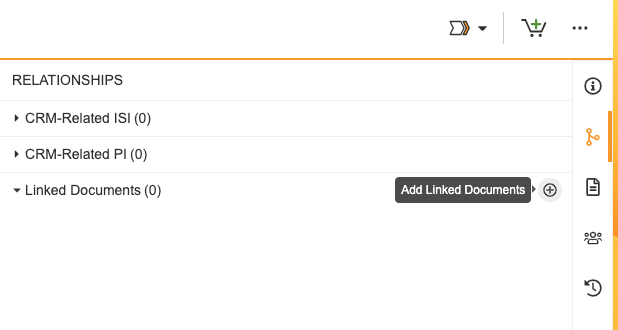
- Click the blue + icon to open the window to add the iPad Material. Search directly by document number or from your favorite list and click the green + icon to add the document, then choose Close.
8. Approve for use status for the Multichannel Presentation and Multichannel Slides
The Technical Approver manually moves forward the Multichannel Presentation and the multichannel slides inside it, from STAGED to APPROVED by clicking on the arrow icon.
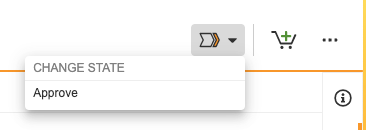
This status moves automatically the document to Veeva CRM Production environment. It stays on the Sales Representatives iPads until it expires automatically when the iPad Material does expire.
Where to find the shared slide
After removing the shared slide from the multichannel presentation, you can find it related in your slides.
First open one of the slides, then select Relationships section, finally open Related Shared Resource.
