Basic Template Development
The users who decide to choose the basic level of customization will have a 100% functional Starter Template in less than one hour. Veeva Vault PromoMats and Assembler Online provide users to the solution of creating their own starter templates, starting from global approved structures that can be copied and modified to fit the local needs.
Summary of the basic template development:
- Select the Global template
- Make a copy and fill the metadata
- Return to your library and check it
- Business Approval process and tile replacement
- Approve for Distribution and publish
First Step: Select the appropriate template for the market purposes
From the “Portal” area of Veeva Vault PromoMats, select the Global Portal. Upon entering, click on the Starter Template widget to display all available templates. Use the filters -such as brand- to refine the search and write into search bar at the top of the screen the type of template, either Veeva or Salesforce Marketing Cloud (SFMC), as emails are also defined by their delivery platform. Choose the Starter Template which better fits with your purposes.
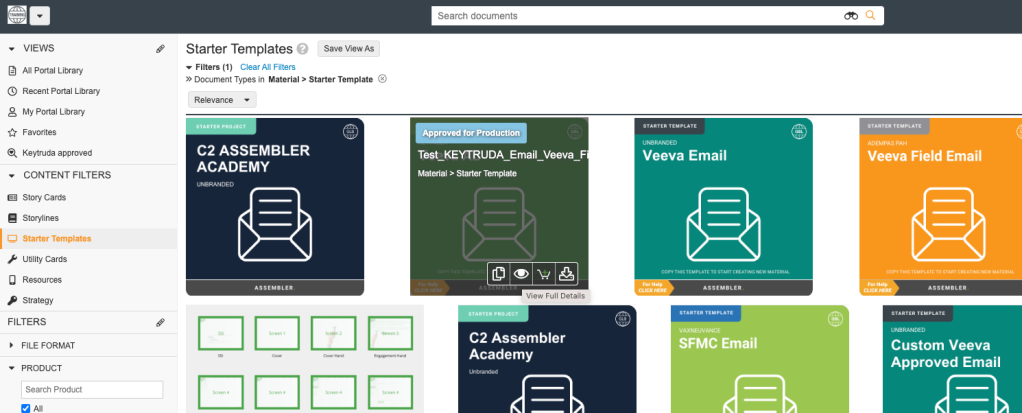
Second Step: Make a copy and Fill the metadata properly
Click on the template and click on the eye icon to view its full details. To reuse the chosen template, users should make a copy to their library by clicking the three dots and selecting the Make a Copy field shown below.
Once the copy has been made, the name and metadata will show up for the copied template. Now, by filling the Metadata is when the Starter will be prepared to be used locally. Consequently, take special attention choosing the country and language.
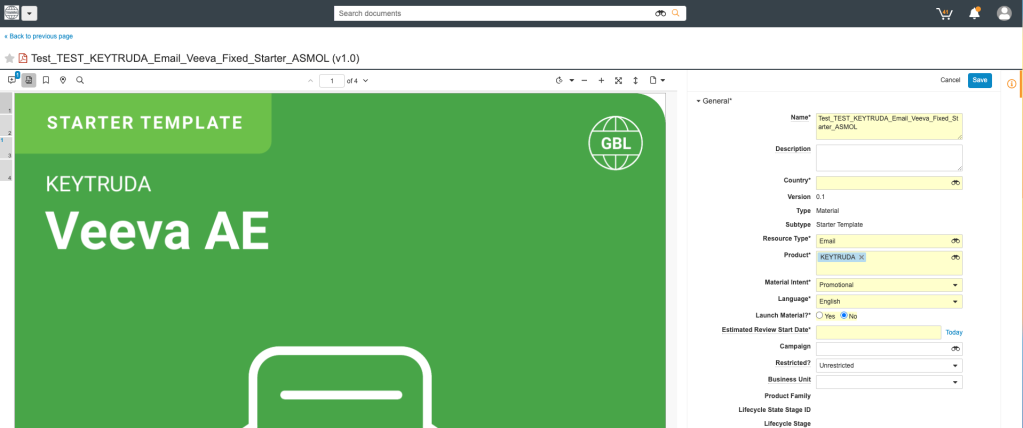
Third Step: Return to your library and check it
Your projects will always saved into “My Library” folder inside the Veeva Vault PromoMats Library. Therefore, return to your library and open your newly template by clicking on “Open with Assembler” through the actions menu (three dots). The project will be open in a new browser tab.
Fill/translate the sections according to the market requirements and include the appropriate layout, replacing any content gaps by inputting text and images. Elements for special consideration are the template header, footer, disclaimers and corporate logos.
Once the template doesn’t need further modifications, the last click in Assembler Online should be upload to PromoMats/Upload for review. All the changes will be saved.
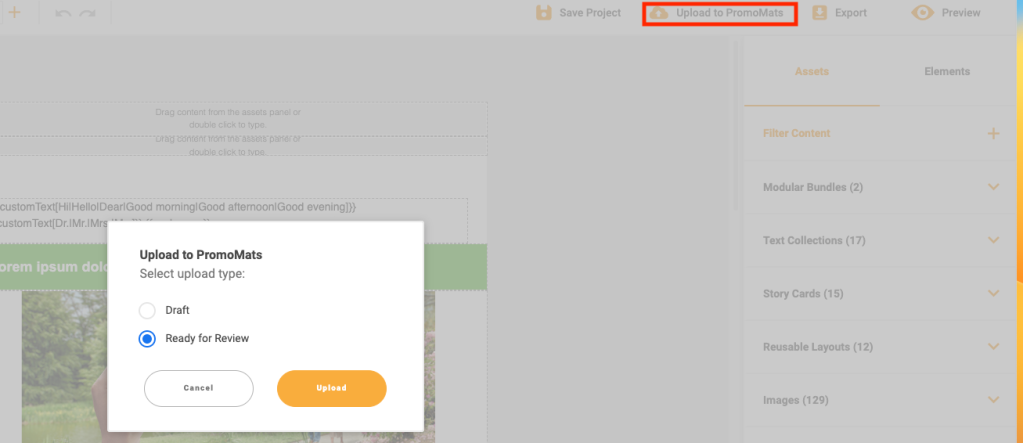
Fourth Step: Business Approval process and tile replacement
The Starter Template should comply our company standards, consequently, the business team will revise the material and correct it if needed. Once the process is over, the material will get the “Approve for Production” Stage. Before starting the Approve for Distribution and publishing procedure, the Job Owner can replace the template preview with a custom tile.
Every Global template (and consequently, the copies of them) has into the attachment section a tile template in PDF
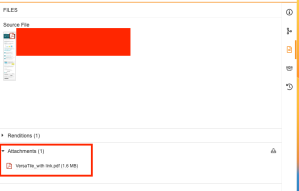
Users can download and fill easily the PDF, save and replace the preview by:
1. Deleting the preview by going to renditions and pressing the cross icon.
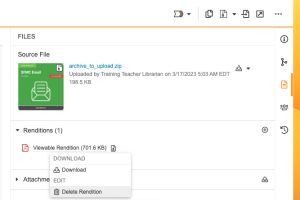
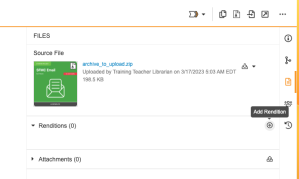
2. Press on the plus icon and choose the PDF into the browser and selecting Viewable rendition in the dropdown menu.
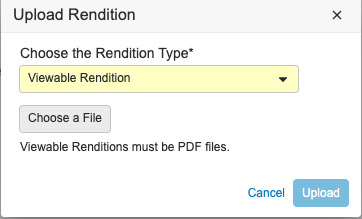
3. The new tile will appear as a main rendition, as well as the thumbnail.
Fifth Step: Approve for Distribution and publish
The Approve for Distribution stage is initiated by pressing on the “complete” in the the green bar or clicking the “Approve for distribution” option in the arrow.
Now, to share the template across the company, it needs to be published. To carry out this action, the Job Owner will support with the Country/Region’s Content Steward. This role will publish the Template into the Portal by clicking on “edit fields”, scrolling until “Portal details” and choosing the desired Portal.